Fixing an NS Design Stand that won't tighten fully to your EUB
An issue that sometimes occurs with the special "single mounting point" stands used by the NS Design Electric Upright Basses (and Cellos) is that the thumbscrew that should fully and securely tighten against the body doesn't quite tighten enough, and the instrument "drifts" a little, rotating on the stand. Obviously, this behavior is unwanted, as the bass should stay securely in the position you've set it in.
This happens for a simple reason - the adjustment wing screw on the stand has a threaded bolt end, which screws into an inset threaded sleeve mounted in the bass. The bolt on the stand is sometimes a little longer than the hole and insert in the bass will allow, and the bolt "bottoms out" in the hole before the mounting disc on the stand is tight enough against the bass surface to keep in in place.
So the simple solution is to slightly shorten that bolt, which will allow for a more secure fit. And, thankfully, it's about a 5 minute job that should only cost you about 40 cents.
Here's what you need:
- 1-4 #8 flat metal washers
- A small flathead screwdriver, heavy-duty tweezers, or some other thin flat metal device (see below for explanation)
Here's how you fix it!
- You need to remove the wing screw from the head joint part of the stand. It's actually a very simple standard nut holding it in. The wing screw freely slides back and forth in the slot a bit, and the retaining nut can almost be seen - what you need to do is get a thin flathead screwdriver or other thin (dull) blade in there to keep the nut from rotating, and turn the wing screw to loosen and remove the nut so that you can pull the wing screw out of the stand.
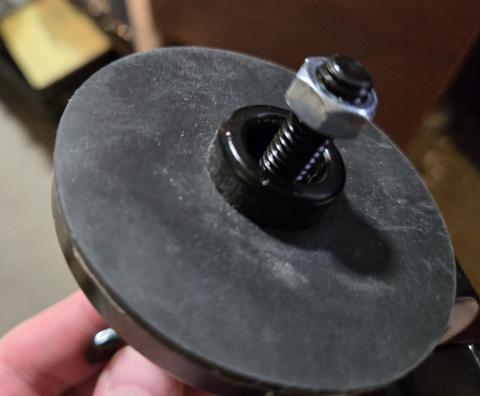
I used a pair of heavy duty tweezers that worked very well (see second photo) because I could jam it in there and it held against two of the flat sides of the nut. The nut may have a little thread lock applied to the threads to keep it from accidentally loosening, so it might take a little effort to break the seal.
using a small screwdriver to loosen the nut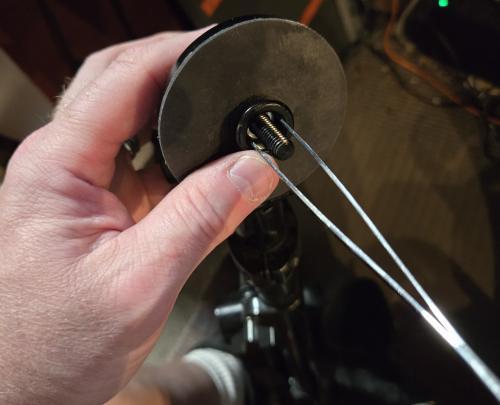
I used a heavy-duty tweezer to grip both sides of the nut, making it easier to remove - Once the nut clears the flat round plate, you can easily take it off with your fingers from there. And the wing screw will pretty much fall out into your hand. Great!
The nut is easily removed once it "clears" the edge of the mounting disc. - Now that the wingscrew is removed from the stand's headjoint, let's move on... simply take a few of the washers and put them on the wing screw as shown. I usually start with three - that seems a good balance between enough to make the required difference and not too many. Of course, if you're using some random washers you dug out of the bottom of your toolbox, adjust to the thickness of the washer(s) you're using. A little trial and error may be required.
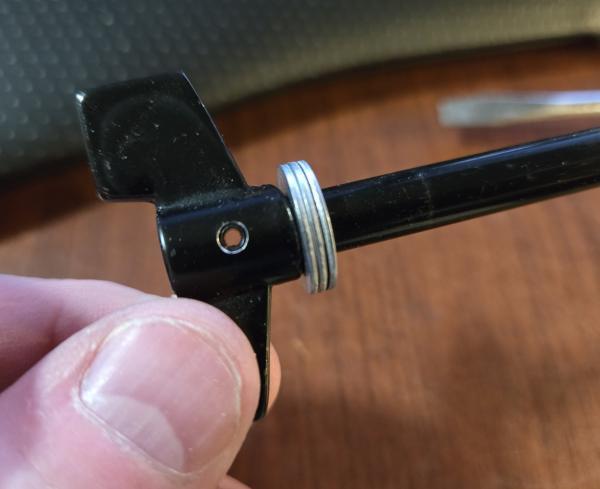
I usually start with three washers. You might need to adjust based on your instrument's unique construction - Now reinsert the wing screw into the headjoint with the washers between the wings and the headjoint.
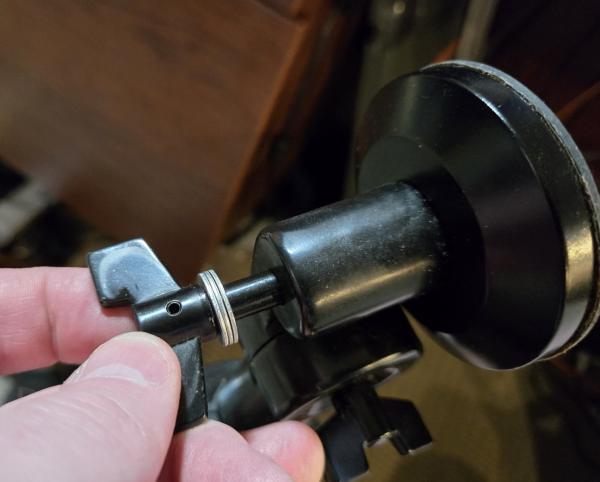
The washers go between the wing and the headjoint. This will effectively "shorten" the length of the bolt where it extends through the mounting disc. - You can now TEST FIT the stand on the bass before you replace the retaining nut. Attach the stand to the bass now, tighten securely, and see if the added washers allow for a more confident grip of the stand against the body. (The washers that you installed have reduced how deeply the threaded post extends into the bass so that it doesn't "bottom out" in the mount, which was preventing you from completely tightening the stand against the bass body.)
If all is well, and the stand now holds the bass securely without slipping, move on to #6. If the stand is still not tightening all the way, add another washer or two (and test again) before proceeding. - Now, simply reinstall the retaining nut - the same way you removed it, but in reverse. This will keep the wing screw from falling out and getting lost, just like before.
I hope that helps - if this is confusing, or missing a step, I'm happy to provide more assistance on the phone or by email!